Showing posts with label Tutorials. Show all posts

Tuesday, September 3, 2013

Glitter Name Sign...because everyone needs one!

I love glitter, it's unhealthy and abnormal but there it is. I love it. I try to put it in as many places as I can... but none more than Maila's room. Holy sparkle. That room is going to shine!

I made this little gem to hang over her crib...


What girl doesn't want some sparkle??

Here's what you need:


-Peice of Wood and something to hang it on the wall with
(I had this sign a friend gave me for Max's baby shower, but it doesn't fit anywhere in my decorations anymore...)
-Modge Podge
-Crafty Cardboard Letters (from Joann's or Hobby Lobby)
-Foam Brush
-GLITTER

First thing I did was cover my wood sign with fabric... it was simple, just wrap the fabric around the sign and staple to the back.

BEFORE

AFTER


Next thing I did was the letters...

I did these one side at a time... apply your modge podge, and then cover with glitter. So simple.


Do that for every side of the letters. You may need to put more than one layer of modge podge and glitter on to make sure everything is covered.

After that, lay all your letters out to dry... leave them overnight. (that's the worst part!!)


I laid mine on upside down paper plates...

After everything is dried, attach them to the fabric. I QUICKLY applied hot glue to the back of the letters and then put them on my sign. It was simple, easy, and the hot glue is holding up fabulously!

Enjoy!


ENJOY!!

..now go vacuum up all the glitter that's everywhere...

Friday, August 16, 2013

Another Nightstand Transformation

I did a nightstand DIY before...


But this one is a little more time consuming... I had to transform this little dresser because I HATED it's "decorative accents". But it was basically free and I needed a little table... so a little elbow grease helped me do this... and I LOVE it!!


Here's how I did it...


3 simple steps. I just pried off those accent thingys (super technical word usage - I know) with a flat head screwdrive and pliers. Then I sanded. Alot. Then I spray painted (didn't want paint streaks). Make sure to sand inbetween painting but make sure the paint is totally dry. I did 3 coats of spray paint in a high gloss white. Love it!

Then just replace the drawers with some new ones and viola! New table! It looks totally different!


Easy peasy..

Stay tuned for how I transform this awesome chair I found on the SIDE OF THE ROAD!! What??
Why do people throw away perfectly fine pieces of furniture... Their trash is my treasure!!


Friday, April 12, 2013

Tips for an Organized Pantry

I'm taking a break. I'm taking a moment to step away from the doom and gloom that has been the last couple days and take some time for myself. Need to recharge a little bit and get my head out of the dark clouds. Which in my world means, work on a project while the kids was Toy Story 3 and Mickey Mouse.

Yesterday, I tackled my pantry...and boy did I let out some pent up frustration on those shelves!! But they deserved it. So today, I'm going to share a little of what I have learned from surfing the internet and organizing and what worked for me in hopes that it might inspire you to be a little more organized!!


Tip #1:

Figure out what you actually need and use, and get rid of what you don't. I admit that I have some hoarding tendencies.... especially when it comes to fabric. But sadly I learned that my hoarding extends to food. But mostly because I forget what I have and then I buy more because I don't keep track of ANYTHING!! BIG mistake if you're looking to stay organized... but, the first step is eliminating unused/unwanted items. For me, this mostly meant empty boxes and such. Big things that were taking up a lot of space.


Tip #2:

Divide and Conquer. Separate out your foods and put what goes together, together. It should be easy to go to your pantry and know exactly where whatever it is you're searching for is.

Here's how I did mine...


Now I know exactly where to go when I'm looking for whatever it is I need. SO much nicer.

Tip #3:

Use containers. Baskets, trays, buckets, anything you can think of that will help. Maybe even try things you wouldn't normally use for storage...


Tip #4:

Use a turn table to organize spices/sauces. It's much easier to find what you need when you can just spin a little plate-thingy... Way better than rummaging through everything.

Before

After
Better right?

Tip #5:

Stay on top of it!! Keep a list of what items you have. That way when meal planning, it's easier for you to figure out what exactly you need to buy. We don't want to overspend on groceries, so staying on top of it is crucial to your organization!!


I'm the first to admit that organization in my home is FAR from being anywhere near where I want it. But it's a work in progess and I learn new things every day. But now, at least dinner is way less of a stress bomb for me.

What works for you?? What tips would you suggest??

Sunday, April 7, 2013

Lovey Dovey Custom Shadow Box Tutorial


*swoon*

This projects just melts my heart every time I walk by it. It's so personal, and perfect and the right amount of lovey dovey for my master bedroom. It's just.... heaven.

Do you want to make your own?? Here's how you do it...

Find a shadow box... this one was given to me by my sweet neighbor. It was brown, I spray painted it white so it'd match the rest of my room.

Find a quote that you want to use... mine comes from one of my favorite books.. Pride & Prejudice. (could I be anymore predictable?) 

"You have bewitched me body and soul. And I love, I love, I love you."
Mr. Darcy

I created a printable for this quote so that the hand writing would be perfect... feel free to use it for yourself if you want it!

Put a pic of you and your honey inside the shadow box... I used some of my favorite wedding photos.

 
 Take your wording and cut it to match the size of the glass and tape it to the INSIDE of the shadow box.


Now close your shadow box and trace the words onto the glass... I used what I had on hand. You can use a paint pen, or sharpie or whatever you please...


Now, I'm left handed so I traced from right to left so I wouldn't smear the paint.


That's it. Wait for your paint to dry, open the box, remove the paper and enjoy!! Easy peasy!! I love mine!!!


*swoon*

Modge Podge Diaper Box

Well hello there!! I'm really excited about this tutorial! Mostly because I've been planning for it for like ever.. it was just a matter of finding the right wrapping paper, which I finally found, and a matter of finding the time.... but ever since Maila has been on the mend, time has been on my side!! She naps like an angel and even sleeps through the night!! *swoon*


Here's what you need to make your own:


First thing you want to do if there's any white in your paper is spray paint your diaper box white. You only need on coat of spray paint and it doesn't have to hide everything perfectly. Just enough for the pattern on the diaper box to not show through the white of your paper.


Don't worry about spray painting the bottoms. I don't because I'll never look at them so it won't bother me. You can if you want :)

The second step is measuring out your pieces of paper. You want to be sure that there's an overlap with your paper. Don't make it the exact size of your box. Now, I forgot to take a picture of this because I'm stupid, but it's pretty easy. Just like you would when wrapping a present, unroll your wrapping paper and cut out the pieces that you need!! Easy peasy!

When your spray paint is dry, bring your box inside and let's get to work. Take your modge podge, and starting with the smallest ends...


Put a healthy coating of modge podge all over that bad boy and then carefully lay your piece of paper on top. Smooth out with your hands, or a spatula or something to get rid of air bubbles...


Now, let's take care of where the paper is too big. Let's start with the sides... Put another healthy layer of modge podge and then fold over. Smooth out the air bubbles... Repeat for both sides.


Now. let's do the bottom... Another healthy coat of modge podge, and then fold the sides down first, and then the bottom. Make sense? Here's it in pictures...


Put another layer of Modge Podge over the top and wait for it to dry to make sure that it's sealed.

Repeat this process for the inside of the box, like so...


When both of your smaller ends are done, it should look like this.


Obviously, I was awesome at removing the air bubbles.

Repeat that whole process for the long side of your boxes.


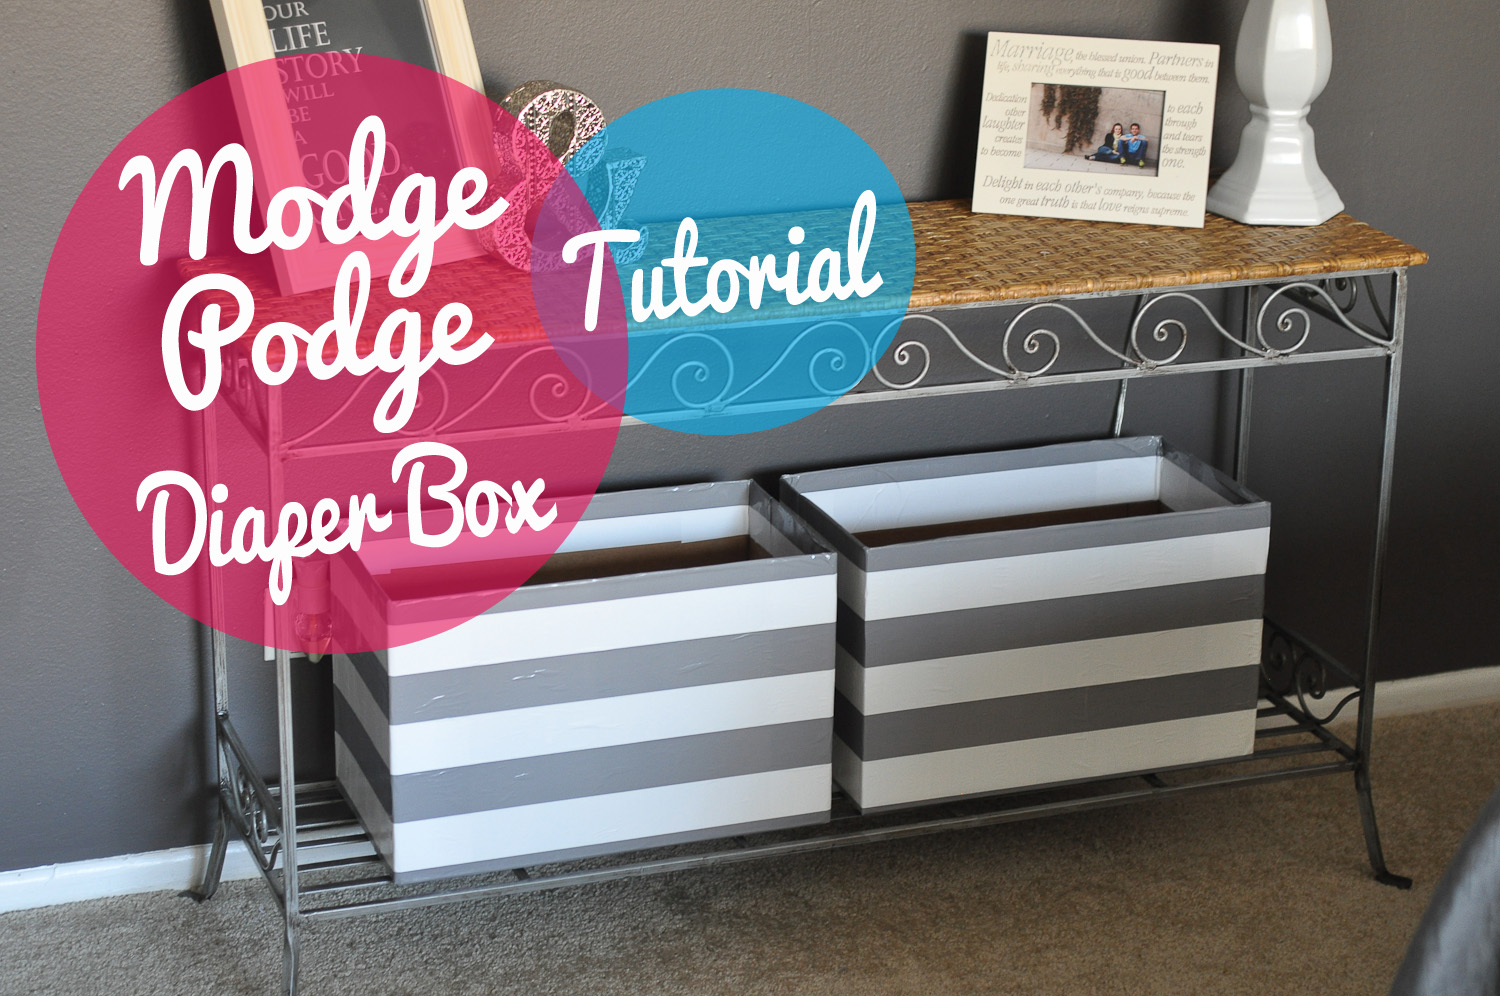
Now, you could leave it like this... or you could get super fancy and paint it...


 I only painted one side in case I didn't like it... and truthfully?? I'm not crazy about it. But maybe I'll swing it around for Valentines Day or something...


I love them. They are perfect in my room. Good for the storage... plus they're pretty.

Win.